Browse, Search, and Manage BigCommerce metafields visually
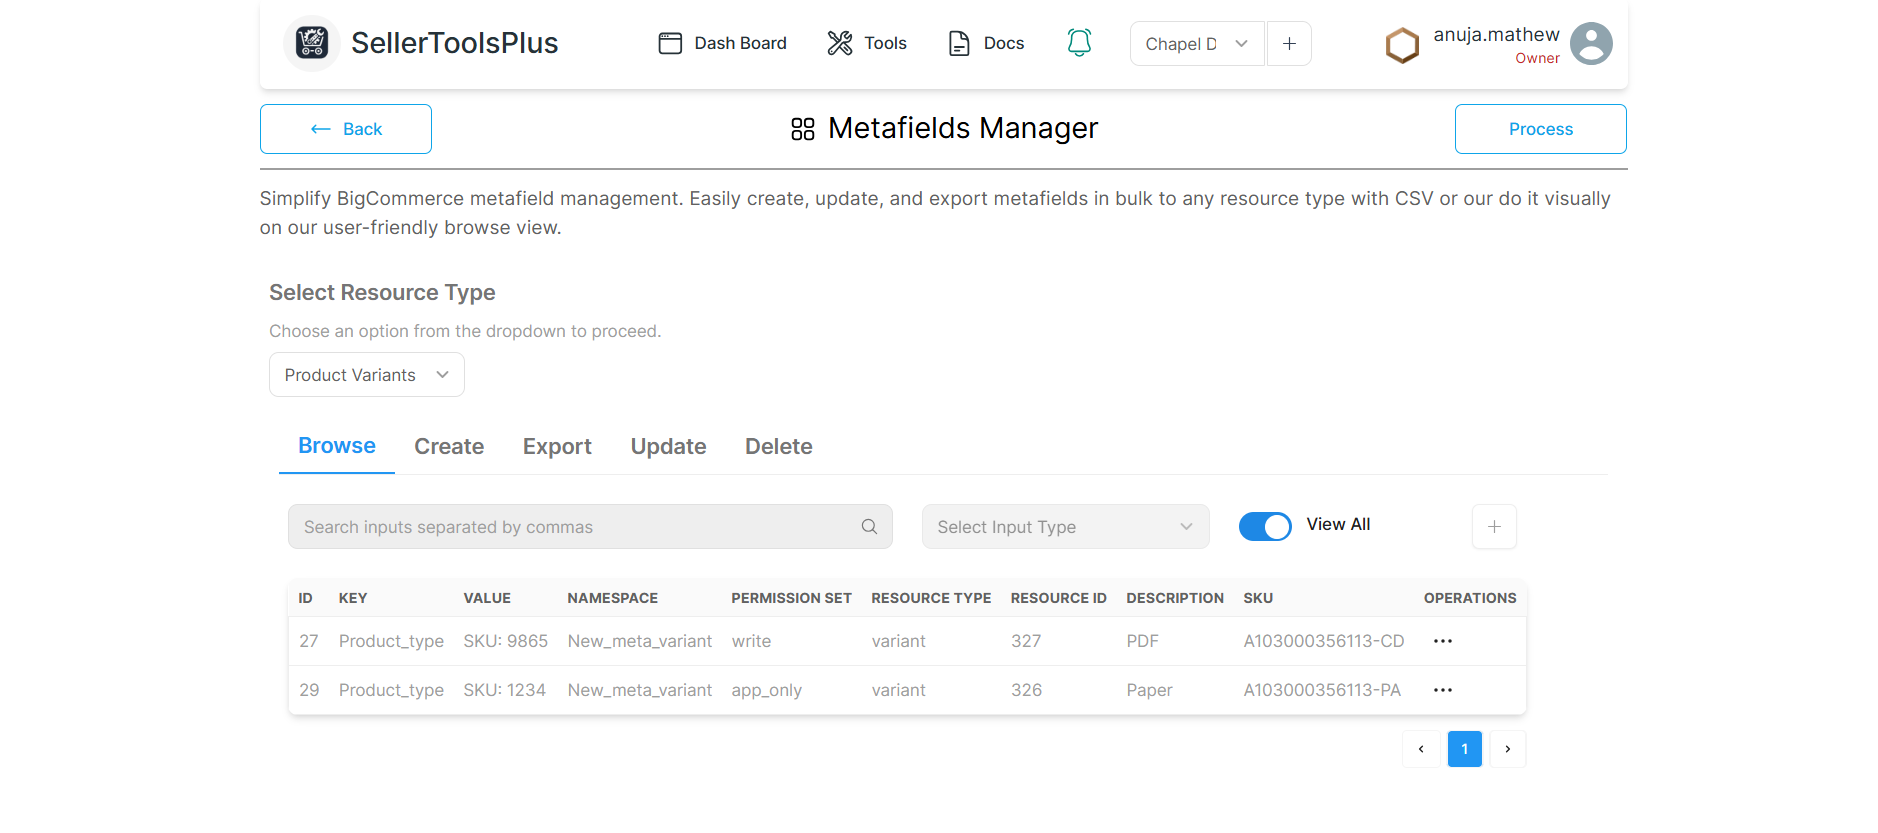
When you open the metafields manager tool, you will be welcomed with a view where you are able to browse and manage metafields visually. All you have to do is to select the resource type and either browser through pages or search to find the BigCommerce metafields you want to manage. Read on and we wil help you navigate the UI and make you the expert of managing BigCommerce Metafields like a wizard with a magic wand.
The user interface

Create a new metafield to a product
Steps to create a new metafields to a product
- Step 1: Initiate the process by clicking the + button located to the right of "View All."
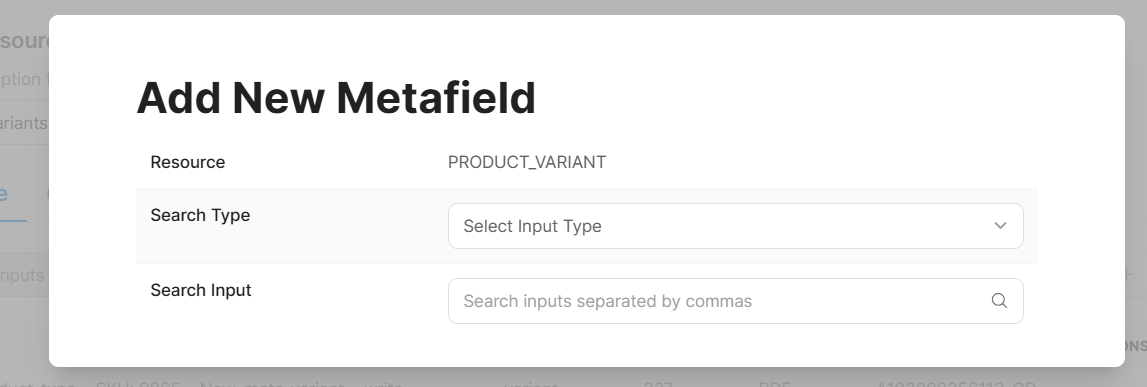
- Step 2: A new pop-up window will emerge, presenting fields for Resource ID, Search Type, and Search Input.
- Step 3: Populate the Search Type and Search Input fields. A dropdown list will then populate with matching search data.
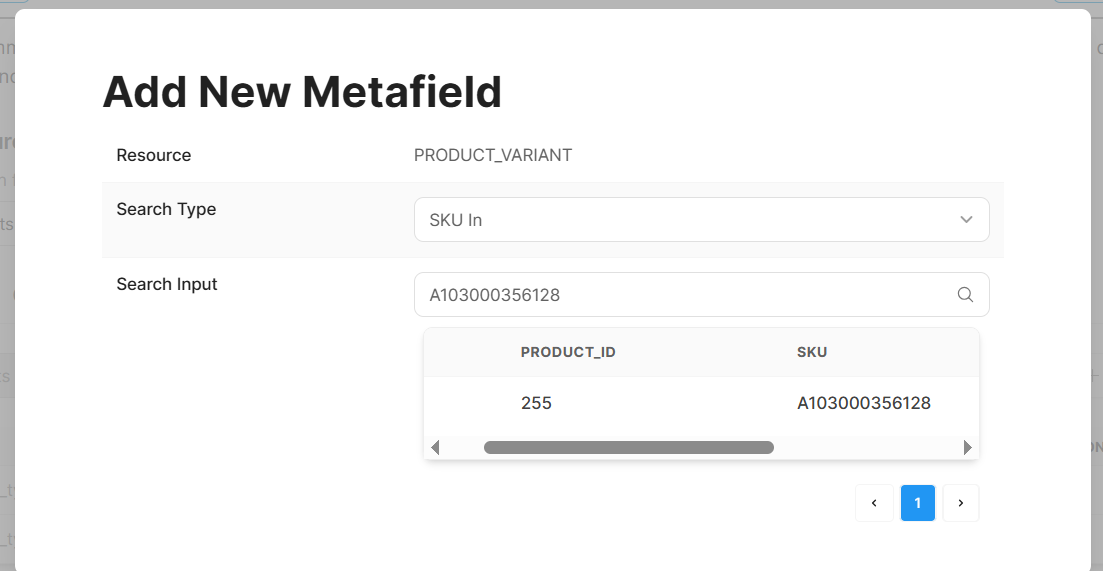
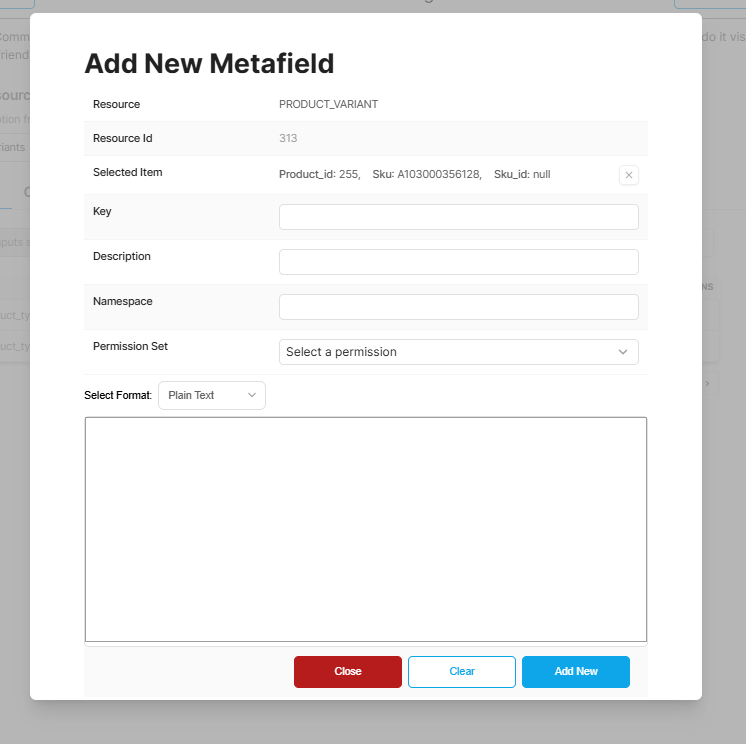
- Step 4: Select the relevant search data from the dropdown. This action will open another window where you'll provide the necessary information to create a new metafield for products that currently lack one.
- Step 5: Finalize the creation by clicking the "Add new" button.
- Step 6: To confirm the successful addition, navigate to the Browse tab and verify the presence of the most recent entry.
Searching BigCommerce metafields.
Our tool allows searching for a particular metafield and once you find it, you are provided with options to manage the same. Currently you can search BigCommerce metafields based on the following parameters
- Search using key
- Search using namespace
- Search using name
- Search using SKU
- Search using
Managing metafields
The three dots option menu on the right most column of each item in the table lets you manage that particular item right fromt the UI. Options are given below.
Add new
This option opens up a form to add a new metafield to the selected resource ID. We have a visual editor that helps you add JSON, JSON table, Plain text, HTML and RichText content with eaze.
Steps to add new metafields to product or other options whether the metafields are already present.
- Step 1: In the Browse tab, click on the three dots next to the metafields entry
- Step 2: Select the Add New on the menu.
- Step 3: A new window will appear, pre-populated with an unedited Resource ID, Resource Type, and SKU.
- Step 4: Enter the required data into each of the designated text boxes.
- Step 5: Next, click the "Add another metafield" button. This action will associate the new metafield with its corresponding Resource ID.
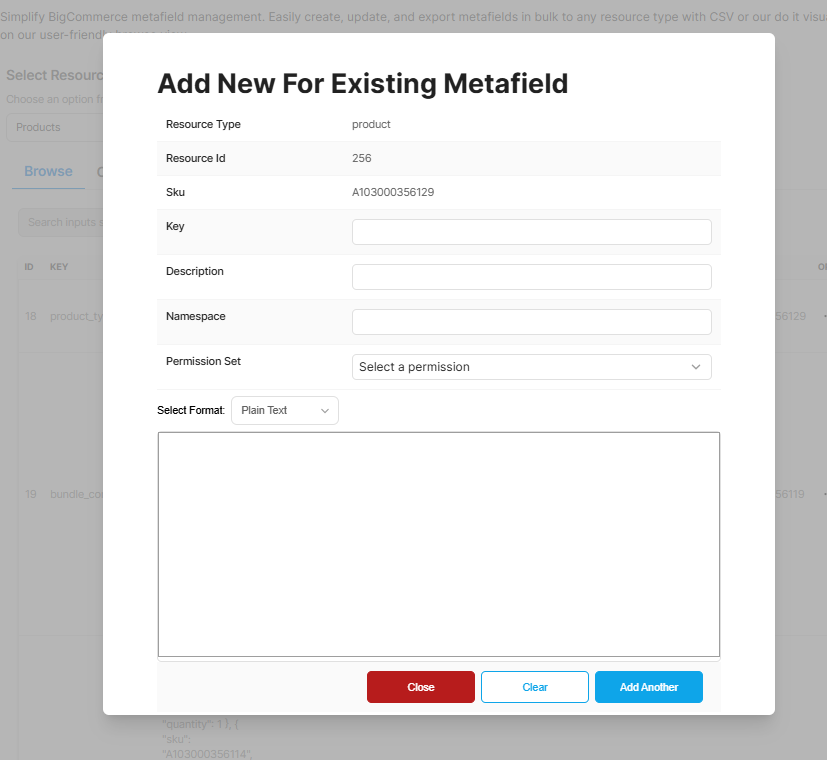
- Step 6: To confirm the addition, navigate to the Browse tab and verify that the most recent entry is displayed.
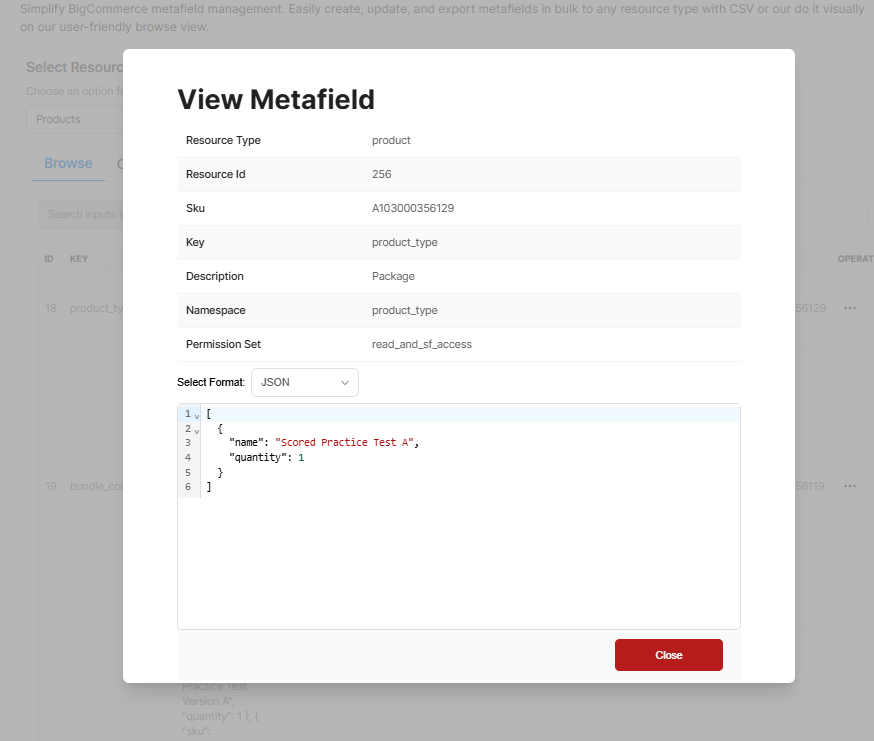
View Details
This is the simple option to open up that particular metafield item and lets you view the detais in a dedicated pop up unser interface. Enables the user to focus on one particular item.
Steps to do View Details
-
Step 1: In the Browse tab, click on the three dots next to the metafields entry
-
Step 2: Select View Details from the menu
-
Step 3: A new window appears with the details of the metafield entry, we cannot edit these entries; there is a read-only option available
- Step 4: To exit from the view details window by clicking on the close button.
Update
This option opens up a form to edit that particular metafield item. We have a visual editor that helps you add JSON, JSON table, Plain text, HTML and RichText content with eaze.
Steps to update a single metafield entry
- Step 1: Go to the Browse tab and click the three dots icon next to the desired metafield entry.
- Step 2: From the dropdown menu, choose Update.
- Step 3: A new window will appear, pre-populated with read-only Resource ID, Resource Type, and SKU. You'll see editable fields such as Key, Description, Namespace, Permission Set, and the metafield's Value (which could be in JSON or another format).
- Step 4: Modify the data within the corresponding editable text boxes.
- Step 5: Click the Update button to save your changes to the metafield associated with that resource ID.
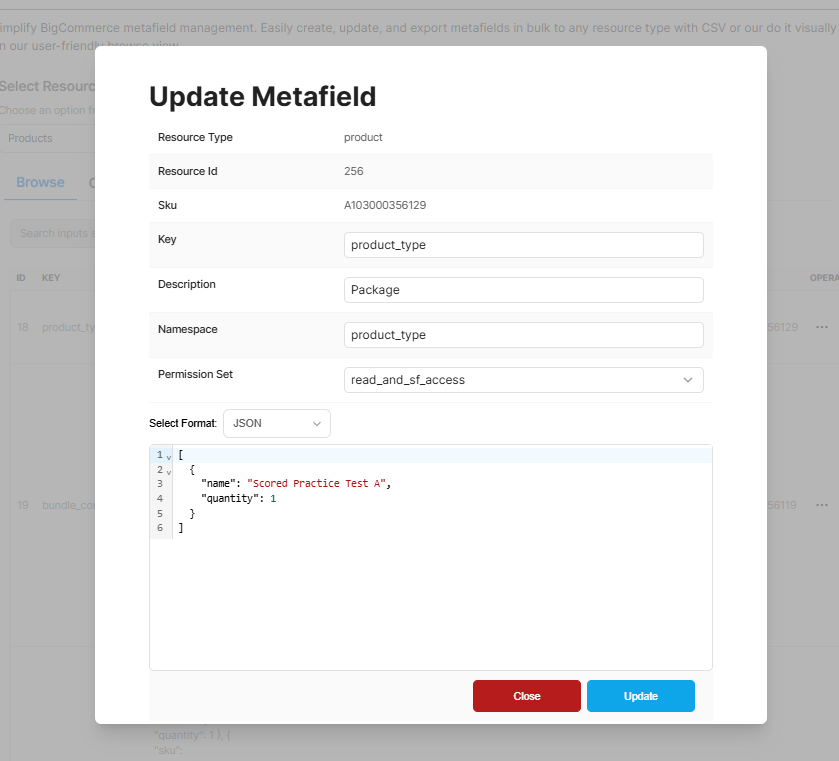
- Step 6: To verify the update, navigate back to the Browse tab and confirm that the metafield entry now reflects the changes.
Delete
This is self explanatory, delete will permanently remove the metafield item from that particular resource ID.
Steps to delete a single metafield entry
- Step 1: Navigate to the Browse tab and click the three dots associated with the metafield entry you wish to delete.
- Step 2: Choose Delete from the dropdown menu.
- Step 3: A confirmation pop-up will appear; click the Delete button within it.
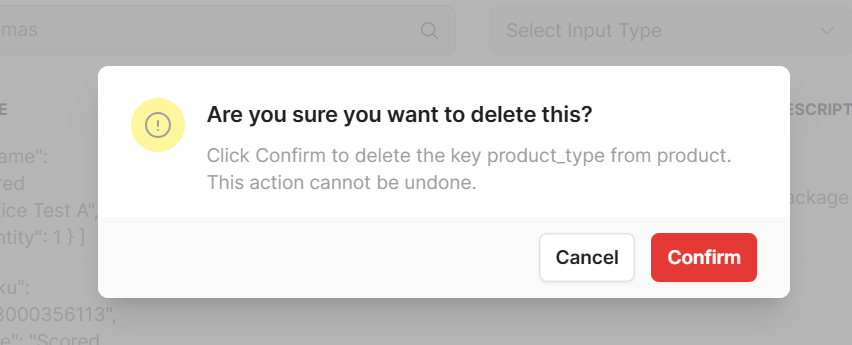
- Step 4: To finalize the removal, click the Confirm button in the subsequent pop-up. The entry should then be permanently deleted.
- Step 5: You'll receive a notification confirming the successful deletion.
Permanent Deletion:
- Meatfields deleted using the tool will be permanently deleted from the store.
- take a back up of these entries if you wish to use this data later
Looking for a solution to manage BigCommerce metafields in bulk? We have the tools.
Read through next sections of this document to learn more about the powerful bulk metafields management capabilities of SellerToolsPlus. Using our CSV templates, our tool can manage metafields in bulk.